
Table of Contents
- Why Vintage Neon Works in Small Spaces
- Best Placement for Neon Signs in Small Rooms
- How to Mount Neon Signs Without Damaging Walls
- Can You Use Vintage Neon Signs in Humid Climates?
- Power Management and Energy Efficiency in Small Rooms
- Pairing Vintage Neon with Retro Furniture and Colour Palettes
- Common Mistakes When Styling Vintage Neon in Small Spaces
- Where to Find Pieces Worth Styling
- Frequently Asked Questions
Last Updated: September 13, 2026
Why Vintage Neon Works in Small Spaces
Styling vintage neon in small spaces works because neon adds light without taking up floor area. A sign on a wall or shelf delivers colour, warmth and a talking point while claiming almost no usable room, which matters in a compact den, garage or apartment.
Customers ask whether a neon piece will make a small room feel cluttered. It won't, provided you treat the sign as a single focal point rather than one item in a crowded collection.
The psychological impact of coloured light
Coloured light changes how a room feels before you notice the sign itself. Warm amber and red tones read as nostalgic and calming, suiting a den or home bar. Cool blues and greens feel sharper and more modern, better for a garage or workshop.
Match the light colour to the mood you want at 8pm, not to your couch. A warm-toned sign in a cool-grey room creates contrast and depth, and vice versa. Matching tone for tone flattens the space.
Best Placement for Neon Signs in Small Rooms
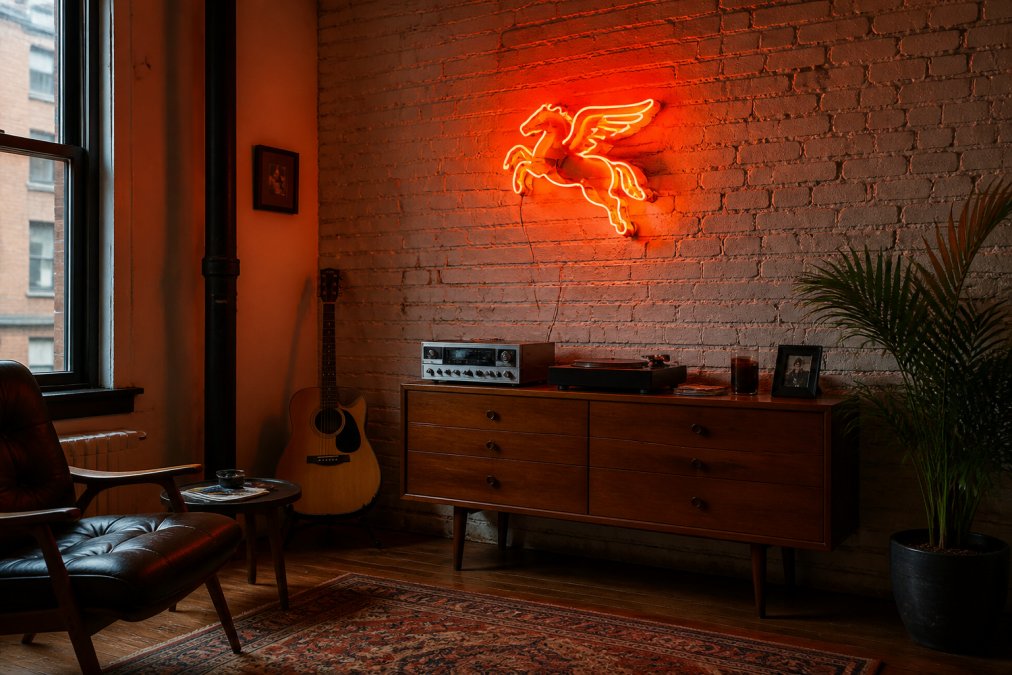
The best placement is a wall you already look at when seated, at roughly eye level and offset from the room's centre, so the sign anchors the space without competing with a window, television or doorway.
A few placement rules that hold up in practice:
- One wall, one sign. Two neon pieces in a small room split the eye and read as clutter.
- Offset, don't centre. Hanging a sign slightly off-centre creates visual depth and stops the room feeling symmetrical and stiff.
- Above a sideboard or bar cart. This gives the sign a purpose and a base, rather than floating alone.
- Keep it off the window wall. Daylight washes out neon, so the glow only reads properly after dark.
Using neon as a focal point without overwhelming the room
A neon sign becomes a focal point the moment it is the brightest thing in the room, which a dimmer switch controls easily. Turn it down to a soft ambient glow for everyday evenings and up to full brightness when guests arrive.
The mistake is treating the sign as one of many statement pieces. In a small room it should be the statement piece: strip back competing decor, keep walls plain, and let the neon carry the room.
How to Mount Neon Signs Without Damaging Walls
You can mount a neon sign without damaging walls by matching the fixing method to three variables: the sign's weight, the wall substrate, and whether you rent or own. Most styling guides skip this, which is why so many small-space dwellers end up with a sign on the floor and an unexplained hole in the plasterboard.
Start by weighing the sign. A lightweight LED neon panel might come in under 1 kg, while a converted slot machine bar or glass-tubing piece can run 5-15 kg or more. That number decides everything else.

Then identify the wall. In most homes you'll meet one of four substrates:
- Plasterboard (drywall): hollow behind the surface. A fixing must either hit a timber stud or use a hollow-wall anchor rated for the load.
- Brick or masonry: strong, but brittle. Requires a masonry bit and a wall plug or sleeve anchor.
- Timber panelling or weatherboard: takes a wood screw directly, but check for a cavity behind it.
- Tile: drillable with a carbide bit, but prone to cracking if you use hammer mode. Tape over the drill point first to stop the bit wandering.
Collectors tend to over-engineer rather than under-engineer the fixing. Choose one rated for at least twice the sign's weight, because vibration, door slams and seasonal movement add load over time.
Before you drill, plan the cord run. A cord draped across a doorway undoes the whole effect. If the nearest power point is on the wrong wall, use slimline surface-mounted conduit or cable trunking along the skirting rather than an extension lead across the floor.
Rental-friendly mounting options
Renters have four genuinely workable options that avoid drilling, and each has a clear weight ceiling.
1. Adhesive picture hooks and strips. Removable adhesive strips are rated by weight, typically 1 kg, 2 kg or up to around 7 kg for heavy-duty versions (choice.com.au). They work on smooth, sealed, painted surfaces, glass and tile, but fail on brick, textured plaster, unpainted timber and anything dusty or greasy. Clean with an alcohol wipe and let it dry fully first.
2. Freestanding surfaces. A sideboard, shelf, bar cart or console becomes the sign's base. This is the safest option for anything heavy and lets you reposition the sign when you rearrange. The trade-off is competition for surface area with lamps, plants and drinks.
3. Floor-standing easels and stands. A sturdy easel or purpose-built floor stand suits larger pieces with no wall contact. Look for a wide base and a weight rating above your sign's mass; a top-heavy easel is a tipping hazard in a small room.
4. Tension rods and over-door hooks. For very lightweight LED signs, a tension rod across a recess or an over-door hook can work, but these are marginal solutions. They suit a 500 g novelty piece, not a glass-tubing sign.
The honest limitation: no adhesive fixing suits a heavy glass-tubing sign. When adhesive fails, it fails suddenly and takes the sign, the paint and sometimes the glass tubing with it. If your piece is substantial and you rent, a freestanding surface is the only responsible choice.
If you drill in a rental, check your lease first. Many Australian tenancy agreements allow picture hooks for minor fixtures but require patching and repainting at the end of the lease (tenants.org.au). Spackle, matching paint and a sanding block usually restore a small hole to inspection standard, a masonry anchor hole in a brick feature wall is much harder to hide.
Can You Use Vintage Neon Signs in Humid Climates?
Vintage neon signs can be used in humid climates, but the sign and its power supply need protection from moisture. Original glass-tubing signs are more vulnerable than modern LED neon, because older transformers and wiring were not built for damp air.
If your space is a garage, enclosed balcony or coastal room, follow these rules:
- Keep the sign out of direct rain and spray.
- Mount it at least a metre above floor level so rising damp and mopping splashes stay clear.
- Check the transformer and plug for corrosion every few months.
- Switch the sign off at the wall when the room is not in use.
- Prefer LED neon for genuinely damp rooms; it tolerates humidity far better than vintage glass tubing.
For any electrical work on an older sign, use a licensed electrician (esv.vic.gov.au). Mains wiring is not a do-it-yourself job, and older transformers in particular should be inspected before they are run for long periods.
Power Management and Energy Efficiency in Small Rooms
Power management is where small spaces differ from large ones. A compact room usually has fewer power points, so the sign competes with lamps, chargers and a bar fridge for the same outlet. Plan the power before the position.
A few practical fixes:
- Use a smart plug or timer so the sign switches off automatically rather than running all night.
- Run a slimline extension or power board along the skirting behind furniture, keeping cords out of sight.
- Add a dimmer switch to cut both brightness and running cost in one move.
- Group your lighting on one switched outlet so the whole corner turns off together.
Heat output and dimmer switches
LED neon runs cool and draws very little power, making it the better choice for a small, poorly ventilated room. Traditional glass-tubing neon runs warmer and uses more electricity, so it needs breathing room around the transformer. Neither type should be boxed in behind furniture or covered with fabric.
A dimmer switch solves two problems at once: it reduces heat output and running cost while controlling how much the sign dominates the room. For a piece left on every evening, fit one from day one.
Pairing Vintage Neon with Retro Furniture and Colour Palettes
Vintage neon sits most naturally with mid-century furniture, warm timber tones and a restrained palette. The sign is loud, so the room should be quiet: walnut sideboards, tan leather, mustard or burnt orange upholstery, and off-white walls.
Three pairings that work reliably:
- Amber neon over a timber sideboard for a warm, nostalgic den.
- Red neon against exposed brick for an industrial garage or home bar.
- Blue or green neon with chrome and vinyl for a sharper, mid-century modern look.
Keep the palette to two or three colours. A neon sign against busy wallpaper or a rainbow of cushions loses its impact, and the room feels like a jumble rather than a curated space.
Common Mistakes When Styling Vintage Neon in Small Spaces
The most common mistakes are treating neon as general lighting, crowding it with other decor, and ignoring power and mounting practicalities until the sign arrives. Each is easy to avoid with planning.
- Using neon as primary light. Neon is accent lighting. It throws coloured light but very little usable illumination, so a room lit only by a neon sign feels dim and the colours read as muddy. Keep a warm-white lamp or overhead on a separate switch for everyday tasks, and let the neon take over after dark.
- Buying before measuring. A sign that looks modest in a listing photo can dominate a 2.5 m wall. Measure the wall width, the height between the sideboard and the ceiling, and the sign's actual dimensions before you commit. Leave at least 20-30 cm of breathing room on each side so the sign reads as a focal point rather than a wall-to-wall panel.
- Skipping the dimmer. Full brightness all evening overwhelms a small room and shortens the sign's perceived life. A plug-in dimmer or a dimmable smart plug costs very little and gives you control over how much the sign dominates.
- Mixing too many eras. One neon piece with mid-century furniture reads as curated; neon plus country plus industrial reads as cluttered. Pick one era and let the neon be its loudest voice.
- Forgetting the cord. A beautiful sign with a cord draped across the floor ruins the effect and creates a trip hazard. Plan the power run before you plan the position.
- Ignoring heat and ventilation. Traditional glass-tubing neon runs warmer than LED neon, and a transformer boxed in behind furniture or covered with fabric has nowhere to shed that heat. Leave a few centimetres of clearance around the transformer and never drape anything over it.
- Mounting on the window wall. Daylight washes out neon, so a sign on the brightest wall only reads properly after dark. Put it on a wall you already look at when seated, and let the glow do the work in the evening.
Get these right and the sign becomes the best-value square metre in the room, one object that changes the mood of the whole space without taking up floor area.
Where to Find Pieces Worth Styling
A curated selection makes styling far easier than hunting through random listings. Lost America Cool Classic Collectables stocks a curated selection of vintage-inspired neon and classic memorabilia, including the Hot Rod Neon Light at $50.00, the Marilyn Monroe Collectors Edition Neon Radio at $100.00, and the Vintage Aztec Slot Machine Converted to Neon Bar at $500.00, each chosen to work as a focal point rather than filler.


The key to value is buying a piece you will actually display. A sign that suits your room and era earns its place; one bought on impulse ends up in a cupboard.
Styling a small space around a neon sign is really a question of restraint: one focal point, one colour story, and a mounting and power plan sorted before the sign arrives. That is where Lost America Cool Classic Collectables helps, with a curated range of vintage-inspired neon and classic Americana chosen for collectors who care how a room comes together. Browse the Hot Rod Neon Light, the Marilyn Monroe Collectors Edition Neon Radio, or the Vintage Aztec Slot Machine Converted to Neon Bar, and shop now to find the piece that anchors your space.
Frequently Asked Questions
How do you style neon signs in a small bedroom?
Treat the sign as your one statement piece. Mount it on a wall you see when lying in bed, ideally above a headboard or dresser. Keep surrounding decor minimal and let the neon do the work. A dimmer switch helps you drop the brightness for evening wind-down. Pair it with warm-coloured bedding and timber tones rather than competing patterns.
Are vintage neon signs safe for small, enclosed spaces?
Yes, provided you manage heat and ventilation. LED neon runs cooler than traditional glass tubing, so it suits small rooms better. Keep the sign at least 30 centimetres from curtains or paper items. If using a transformer plug, avoid covering it. A dimmer switch also reduces heat output during long evening use.
Can neon signs make a small room look bigger?
They can. Placing a neon sign on a side wall rather than the back wall draws the eye sideways and adds visual depth. Backlighting behind the sign creates an ambient glow that softens hard edges. Avoid mounting directly opposite a mirror, which doubles the light and can feel intense in a compact space.
What are the best mounting options for neon signs in rented apartments?
Command strips rated for the sign's weight work well on painted plaster. For heavier pieces, use a single small nail with a hook and patch it before inspection. Freestanding display stands need no wall contact at all. Always check the sign's weight before choosing a method, and keep the mounting hardware clean for reuse.